Showing posts with label techniques. Show all posts

15 September 2011

Make and Take

Hi there, 

I mentioned the other day that I was going over to the make and take at PC yesterday and I did. And I likeeed it.  


Here's Teena with her completed project.

That's a box cut out on the Big Shot Pro. Did you know that if you buy your paper at PC you can get things cut out for you on the Pro for I think it's 50c a cut? Good if you've got a wedding in the family, or a party, or a baby shower. Cute.

For our projects we all coloured a La La Land stamp - she was called Fancy Marci - so cute. I also like Sugar n' Spice Marci. So gorgeous.


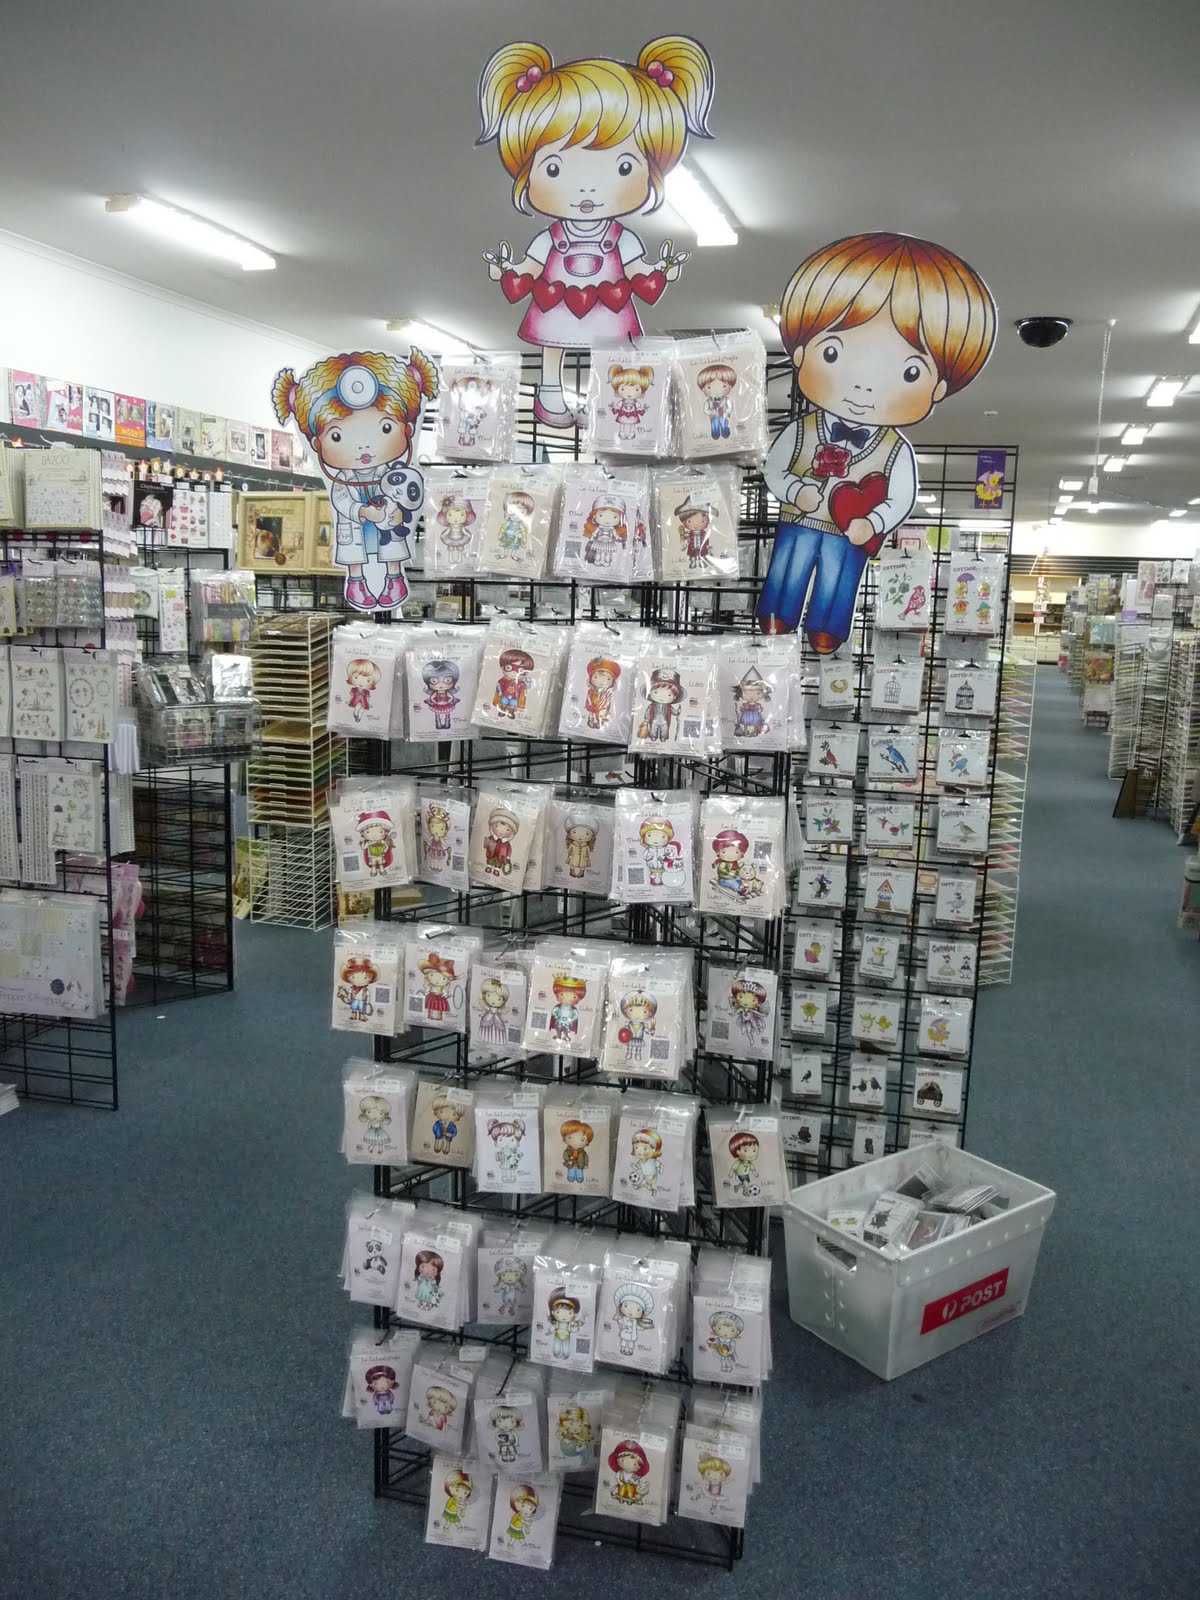
There they all are. La La Land - such a cute name.

Cute - it's one of my favourite words today.


And all the Copic markers. They're amazing. Architects have been using them for years, as well as book illustrators - hello, they're good pens.

So I got to use them for the first time with Trevor showing me the ropes. He ran the make and take and showed us all how to colour in evenly and nicely. I had a light touch apparently.


Here's my Marci.

The hardest thing with colouring (and it's always been the way with me) is settling on the colour scheme beforehand.

With punch art I can punch the shape out until I find the right colour. I can literally stick that flower in her hair in 17 different colours until I find the right one (not that I know anything about that or anything. A punch art girlie was recently giving me curry with the colour of the flower in her hair...needed to be orange in the end).

I'm not overly fussed with the blue and yellow of Marci's dress, but hey, I had to make a decision. Trevor steered me away from pink because he'd seen too much that day - ha ha. I didn't like the green one and I'm not a purple girl, so blue and yellow it was.

I went with red accents and wait for it...


...pink foiled lipstick!

Trevor did the colouring bit with us and the PC girls took over with the extra bits.

To get the lipstick look we used a Quickie Glue Pen (glue with a biro sized tip) to colour in the lips. Then we  heat set the glue (it's the type that goes on blue and dries to clear...and repositional) to make it tacky. And then we put the foil over it and rubbed it on.

So cute and fun - don't you love it?


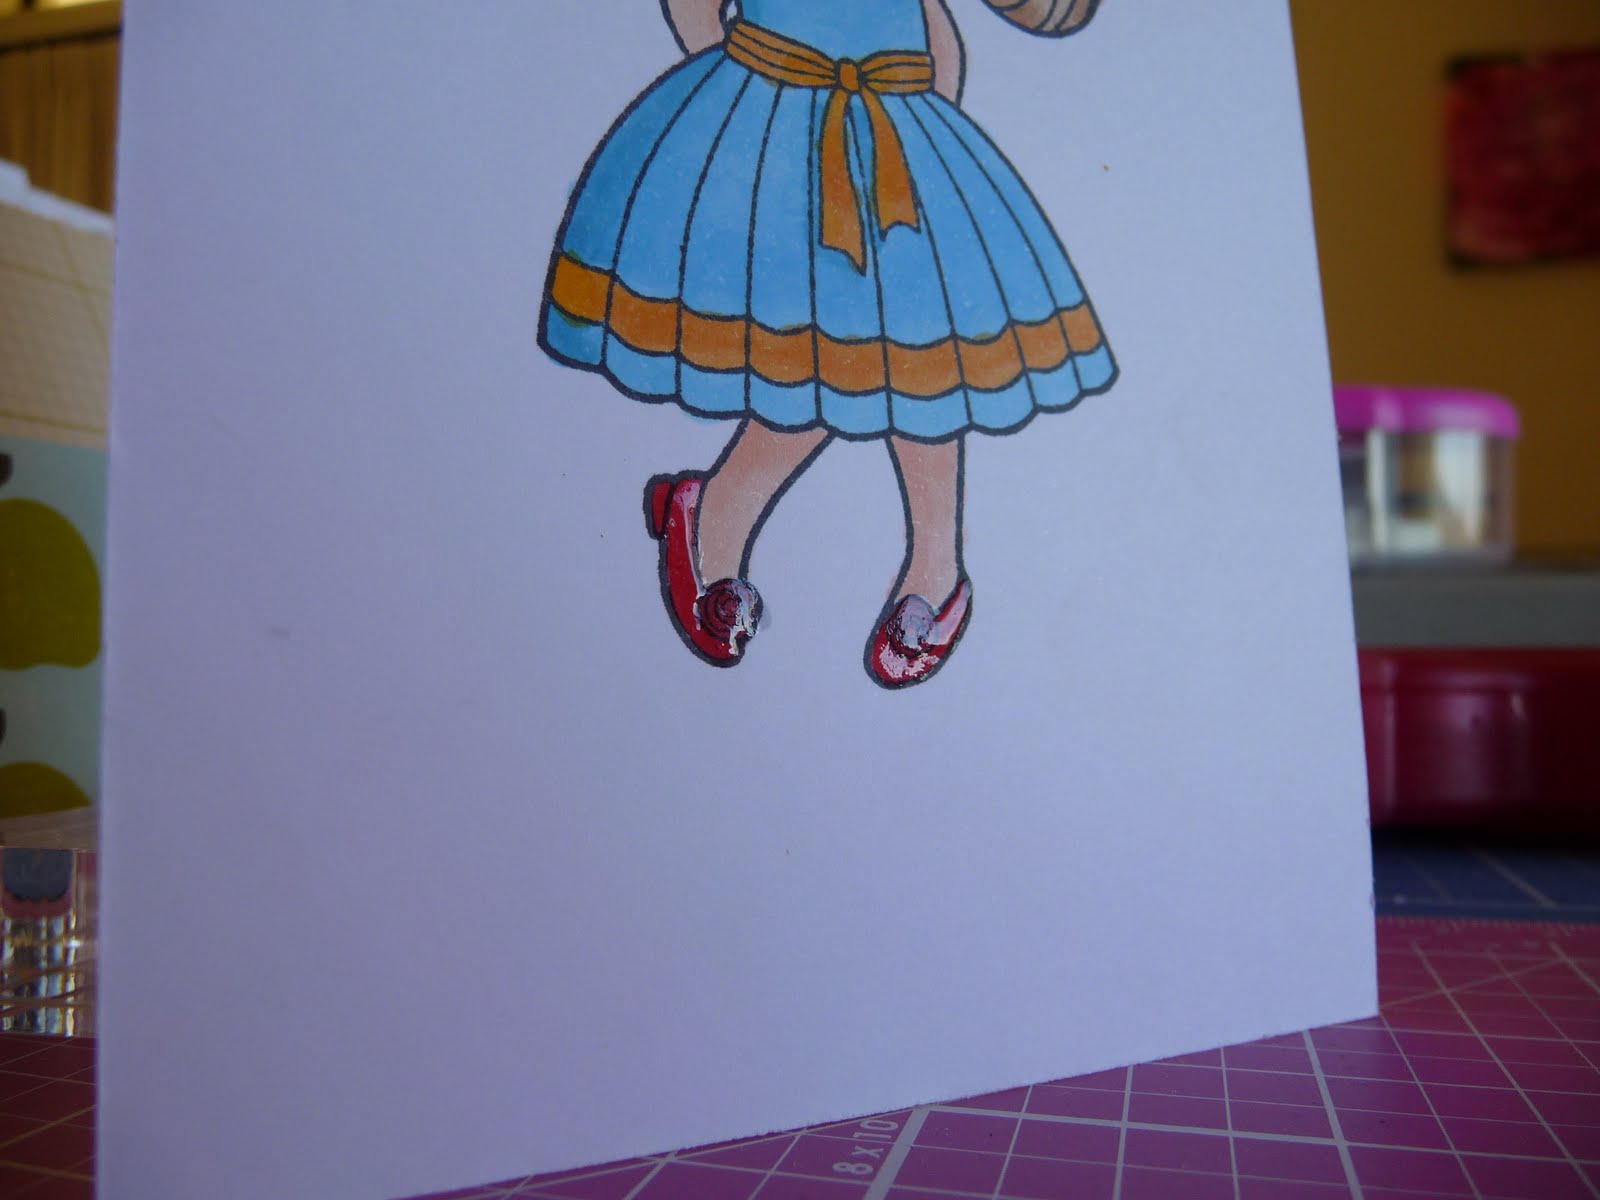
She needed a bit of something to accent the red bits, but they didn't have any red foil, so I added some Dimensional Magic here at home.

Pretty happy with my first attempt with the colouring and I think she's pretty sweet.

I've yet to cut her out. The top of the white is chopped behind her head because that's where we were testing colours and it was putting me off...choppo.

The whole thing was fun, I learnt something new (a few things), got to spend a bit of time with the girls and gave to a good cause at the same time.

Win, win if you ask me except that Mum wasn't able to come. Poo.

Now, Marci, what am I gonna do with ya?

I'll probably cut you out and put you in my photo album at some point. It's all part of the story. That's another benefit of putting photos in albums - you can put other stuff in there too that tells your story. Oh, love it.

26 August 2009

Dahlias

Hi fellow crafters,

Have been making few different flowers lately that I thought I'd share with you.

I've blogged about these Dahlia Nestabilities before. I used them for the clown's collar, and as flowers themselves. They were cream with a blue background. Check the list on the sidebar under cards if you'd like to find them.

On the card below I added hymnal paper as a layer. It adds a different touch, don't you think?

And that's glitter on the button too.


These other flowers are similar to the one on the card except they've been cut between the petals, so each could be pinched for a more 3D look.

There are six flowers, back-to-back. They twist in the bottle, so I wanted them to look good from both sides.

Something easy and fun for the middle of the table when you next have people for dinner?

Bye now.

Early Bird cards coming up next...

:o)

15 August 2009

Chocolate cupcake

A quick idea.

Embossing is good, but remember you can sand it when you use Co-ordinations cardstock so the pattern comes to life. See bottom photo. The Co-ordinations colour is slightly different to the Bazzill brown I used, but you get the idea.


Will post some colour combinations a bit later to finish off the day, and the week!

10 August 2009

Just a little info...

Hi there again,

Just wanted to add a little more info about the Piercerabilities and how to use them. Mine is called Ric Rac Scalloped Border. They can be used in three ways - cut, emboss and pierce. Do just one, or all three, it's up to you.

Here's what the template looks like. It's just sitting on top of a piece of card here ready to be used. The little ridge along the scallop at the bottom is the cutting line.


Here's what the cut looks like. Photo is a little blurry, sorry about that.


And here's what it looks like when you emboss after that. Remember you can skip the cutting part and just do this embossing bit if you like.


And here's what it looks like when you start piercing the holes. Because the sample is embossed at this point, the template sits nicely on the embossing so the holes can be pierced without the template moving. On the other cupcake cards I showed today I just used the piercing part and it was a little trickier to hold the template still while pricking. Worked okay though, just had to hold it down on the slippery bling card.

I like the pattern of the swirly bits when they're pierced - that's my favourite thing to do out of the three options. I find the template a bit tricky to use - I think it's because I use a Cuttlebug machine. There's instructions inside the Piercerabilities packet when you purchase it, which is really helpful. It gives you the sandwich for their own machine, as well as the Cuttlebug, Sizzix Big Shot (and other Sizzix versions) and Quickutz Revolution machines. I used their instructions, but had to change the sandwich to fit my own Cuttlebug. It took a little playing around, but I got it sorted.

Basically whenever I cut any of the Nestabilities on my machine I have to use the A plate, two B plates and 7 pieces of cardstock shim (not necessarily in that order of course). If I use the A plate and C plate to cut - it cuts, but it embosses it as well, and I don't want that a lot of the time.

Just have a little play around with your machine to see what works for you. And write your sandwich down otherwise you will get frust-er-rated! Not that I have any experience with that...
Hope all that info helps you!

15 July 2009

Bits and pieces


Hi, remember this card? The one with the trim using the Fiskars scallop scissors? I've been wanting to show you the trim we were cutting originally to compare it with the ric rac looking one. Below is a photo of both of them (from my sample book). The red trim is the original where the scallops of the scissors get lined up to make a row of what looks like little balls I guess. And the orange trim is the ric rac one where the scallops get cut into so to speak. Hard to explain, but hopefully the picture helps!


Also wanted to show you some pages of my sample book so you have more of an idea of what's in it. Basically it's just bits and pieces stuck in there. It's not really meant to be organised or anything - I just put the sample where it fits in the book.


This is the inside front cover. Punching on the fold of your card (if your punch can handle it) makes a tab. They're the ones at the top glued over the page.


Here's the circle flowers that I like a lot and use a lot. I'm a big non-reinventer of the wheel. Use again and again, I say. Good use for ribbon scraps too. Should do that.


Stitching and paper piercing holes. You can use any shaped template, punch or die to prick holes around for a nice look. Leave just the holes, stitch through with thread or draw stitches with a matching pen. Lots of possibilities there. And a swing card. The white bit swings to the side to reveal a message underneath. Cute. And the green tab out the side is an actual tab punch. I like how it sticks out the side there. Could do that on a card too.


Thought I'd share this card using my favourite shape...circles. Actually it's not a card, it's just a design, but it could be a card. It would be a big one because the background is 6 x 12" so the bears are pretty big too. I used a circle cutter for the faces and my bigger punches for the other bits including the mouth. To make that I punched a smaller circle first then a bigger one around the negative of that circle to make a ring. I then cut a section of the ring to use as the mouth. There's Dimensional Magic on the noses and the heart to finish them off (makes them shiny).

Hope your week is going well. Loved seeing the sun out today, so nice.

21 June 2009

Instant Book

Hey hey,

Here's the link so you can make your own instant book too if you like!

They're a lot of fun. I should do another one too.

Enjoy!

19 June 2009

The little book...


Here's the little book I made about Rustee and I. It's made by folding one piece of patterned paper, which is really cool to do, fun and cheap! Mum saw someone on the net do it and she showed me. You can google it to find some instructions (I'd try "make a book with one piece of paper" or similar).

So the book is small - only 15cm x 8 cm. I kept it pretty simple and used journalling tags and a couple of flower punches inside. And a subtle use of glitter, of course. If I ask Andrew if a card or project needs anything he always says, "A subtle bit of glitter." It makes me chuckle.

That's the book. Please excuse the sappy journalling if you can read it. It's just so nice having her around the place. I work at home, and am by myself a lot, so a friend is good even if she does leave dirty footprints on my patio...

Try one of the books. Fun stuff!