22 September 2011

Review: Fairy Dust Glitter

Hi there, 


I mentioned I'd talk more about this photo when I posted it in the craft show update recently. 

What I want to talk about is the glitter...and review it. 


It comes in three shades - Sugar Shimmer, Pralines & Cream and Mixed Berries. 

Sugar Shimmer is white-ish. 

Mixed Berries is pink-ish. 

Pralines and Cream is brown-ish or cream-ish. 

Hello? Cream-ish...my boat is floating. 


Here are the glitters used on some cardstock. Thought this might help you see the difference in the colours...it does...kinda.

This cardstock is cream - see how nice the Pralines and Cream looks on it?

The Sugar Shimmer is like white sugar and the Mixed Berries has more colour in it (I think it's pinky blue).


This cardstock base is white. The Pralines and Cream stands out a bit more on than on the cream. 

Hope this is helping! 

Below I used cream based papers with Pralines and Cream. Love. 


Okay, so, what else can I tell you?

1. PC sells it for $14.50.

2. It comes in a salt shaker bottle. You can see the red stopper next to it above. You can leave it out or put it in when you (if you) want to transport the bottle.

3. Shaking the glitter on is pretty fun. It's a nice way to do it.

4. There is an issue with the bottle though. The screw channels in the glass bottle neck get filled with glitter when you actually use the bottle. Then when you go to take the lid off to put your excess glitter back into it, all the caught glitter drops onto your work surface.

It's messy and shouldn't happen. Kathy (a friend I saw at the show) and I had to be mindful of that each time we took the lid off. Having to do this did take a little of the shine off the whole glittering process I've gotta say.

To combat it, it's easy enough just to leave the lid off entirely and just pour it on. Good for large areas, not so great for fine work. You do what you've gotta do though, hey?

Okay, they're the basic details, and the not-so-fun bit, now onto the actual glitter.


It's fabulous.

Don't let the issue with the bottle stop you from buying this glitter. You can always put it in another bottle if you want..or leave the shaker lid off like I said.

Above you can see the Pralines and Cream colour...actually, this is the thing...it took me two days to even spot this glitter in the stand at the craft show. How's that? So much going on, so I just didn't see it.

Anyway, I saw it and Googled it on Saturday night to find out about it because I was intrigued by the Pralines and Cream colour in particular.

What I didn't really find out and what I'm going to tell you is....

....this is the glitter you need to use on cream based paper. 

Above I used last year's Christmas line from The (now defunct) Girls Paperie called Tinsel and Twig.

It's cream based. 

It needed this glitter. 

I did a flower from the same line using the Sugar Shimmer and it was a bit too stark on the paper.

So, white based paper = Sugar Shimmer.

Cream based paper = Pralines and Cream. 

White or cream based paper and esp. pink/blue papers = Mixed Berries. 

YUM.

Seriously fab.

Seriously GOOD.


If you do a Google search you'll probably come across Donna herself doing a video of a flower using the glitter. I applied the glitter like she did, but I didn't have her cute glue to use.

Julie (the stencil lady next to me at the show) suggested putting a chocolate in the middle of the flower.

Immediately I thought of doing that for the Christmas table and having one at each place setting. Nice, yes?

Immediately after that I thought that my mother would love to make the flowers and immediately after that I thought I'd ask her if she wanted to.

I know she has the Tattered Florals die and some Tinsel and Twig paper, so we'd be set with two machines, two dies, lots of paper and the gorgeous glitter.

Sounds like fun, right? I think so.

I reckon my sis would want to be in on the act too. Have you got the Tattered Florals die, Sue? Not that it matters cause you can use ours, but just wondering. Oh, Gina stopped to say hi too. She was lovely. Say hi to her for me.


Summary of the Fairy Dust Glitter:

~  The bottle's fun to use, but it collects glitter under the lid.

~ The glitter is fab, fab, fab!

~ The Pralines & Cream was made for cream based papers...oooh, yeah.

~ I used the Mixed Berries on some pinky blue papers and it looked really pretty.

~ I'm really looking forward to making something with white based papers and the Sugar Shimmer.

~ That to me is a sign of a good product - if I want to use it again, and I'm excited to, it's good.

~ Extra note - Obviously in this review I've gone on about using the different types on glitter on different based papers - I still stand by that.

BUT I've also used all three colours on one collection of paper (Daily Junque by Pink Paislee) and they've all ended up looking really lovely. Just wanted to throw that in there!

What I'm saying is - if you have to choose one colour, go with my original recommendations above.

If you're getting all three, forget everything I said and just have some fun!

Tomorrow I'll be back with some more sparkly projects.

Here's to glitter!


21 September 2011

Baker's twine

Woo hoo!


I still love the stuff.

And triple, and quadruple triple, woo hoo, Teena said she's getting it in at Photo Continental soon!!!!

I did a big yahoo when she told me and she laughed, looked at the others around her and said, "It's the simple things."

It is :o)


(I bought these twines on etsy ages and ages ago. At the time I could only buy red/white, blue/white, black/white and maybe one other - twine's come a long way since then)

Melissa at Scrapbook Update has just done an article on Baker's twine and how it rocks basically. Check it out here.

My thoughts:


(source)

I like the Twinery twine when I need a bit more oomph.

The twine is thicker and the colours are deeper and thicker too. That is, there's a lot of red in the red and white twine.


(source)

My favourite is the Divine Twine between these two brands.

The colours are softer and more baker's twiney...they have that cool airmail twine too.


(source)

Hello? Martha Stewart twine. I bought some spools of this for Christmas crafting a couple of years ago - 2009, it must've been. So, so happy to see they've bought it back (kinda came out seasonally and then went again. Don't they know it's a staple???) and in the bigger spool too. Rock on. Or tie-it-on, ha ha.

So many companies are bringing it out now...Photo Continental stocks Doodlebug, Pink Paislee, We R Memory Keepers, Martha Stewart, My Mind's Eye, October Afternoon and now hopefully Divine Twine too (hint, hint!), so we should see a lotta colourful twine coming our way soon.

Can't wait, and just in time for Christmas crafting too.

Check out Melissa's article on Baker's twine at Scrapbook Update here again. It's worth a second look, even if it's just to look at all the colourful pics again. Oh, and Melissa's blog is here - I like it.

Thought I'd show you a couple of projects I've made using baker's twine - I've used it so much it was kinda hard  to choose!


Anything that hangs or sways obviously needs to hang or sway with baker's twine. Really, is there anything better?


Birthday party invitation.

I made a bunch for my sister at her request and suggested she tie a bit of baker's twine on the handle of each. I knew she had some because I gave it to her for Christmas!


Yes, beary cute.

Thanks for the article, Melissa!

20 September 2011

Hat, Cody the swimmer and Framelits

Here's the hat I wore at the craft show - hmmm, I know!


Phase 1: Just the strip like a crown (worn Saturday).

Phase 2: The cross sections and the first circle (worn Sunday).

Phase 3: The four extra loops (worn Sunday after 2pm. The craziness starts to set in then).

I know for a fact that some people could not be paid to wear something like this - I thought it was fun though. Plus it's easy to wear something on your head when you can't even see what you look like.

I did drink a lot of water like I said, so I could go check myself out in the mirror in the bathroom. I really wanted to see what the extra circles looked like. They were...interesting...ha ha. I just plopped my hat back on my head and went out and did my thing.

Who cares? Like really, who cares? Nobody. Life's too short, so wear the hat, I say.


Thought I'd finish today with some cute photos of the dog that I saw when I was going through all the photos on our computer - he's grown so much.

I remember this time - everything was so new for all of us. We didn't know him and he didn't know us. That soon changed and we became buds in no time.


Look at the tummy!


:o)


What a joy he is...and a great swimmer!
He swam outta sight on Saturday and I'm like, "Hello? Come back..." (Andrew wasn't concerned of course). He did came back pretty quickly - he was chugging down the river like a paddle steamer - so funny.

He was originally chasing a duck and when the duck got outta reach, he came back to find us and the ball. The teacher in me found the whole out-of-my-sight thing hard.  Far out, get back here where I can see you.

Anyway, Andrew's not a teacher, he's a guy, and guys don't tend to worry about stuff like that as much as us girls. I'm told he's in charge when we go to places like this. I'd just like fences over the river to keep him wrangled in one spot!


And to finally finish, some Cody cards.

I had them on display at the craft show - they were just the photos on the cards. I made them using the new Sizzix Framelit dies. They're so great - they cut the shapes as just shapes ie. big punches!

I really like Spellbinders and have a few sets, but sometimes when I go to just cut they still emboss a bit and I have to wrangle the whole die cutting to get them to just cut and cut only.

The Framelits cut the shape - one pass through the machine and fabbo, done.

Also, because they just cut, they're good for framing things (thus the name) for cutting like the photos below (you'll see on the link above that they're also bringing out Framelits that match stamps).


I put the square die over the photo and moved it until I got Cody positioned where I wanted him in the square. Ah la Jennifer McGuire, I put a post it note on the die to hold it and the photo together, and then die cut it.

(Honestly, that's one of the best tips I've received in a long time. Gotta hold something still while die cutting? Use the sticky bit of the post it note to hold your paper to your die or whatever. You just peel it off when you're done. Thanks, Jennifer....no really, thanks).

I also used the Framelits to cut the card base. I folded my card and put the fold just inside the top die line (so it wouldn't get cut) and then die cut it. All three sides cut except that top one where the fold was...viola, square card.

Yes, I could've used a trimmer, but I didn't have to measure anything because the two square dies (base and then layer) I used fit perfectly. So quick and neat at the same time.


And I bought the little label dies at the show for 10 bucks. Three punches essentially for 10 dollars - they were made for the Presto Punch from Spellbinders, but PC just carries the dies. They work in your Cuttlebug and Big Shot, so good one.

The heart is from the orange four-in-one Heart punch from Sullivans.

And that's my dog. My gorgeous dog. The photo was taken the day after he had an allergic reaction and was all puffy. Poor fella. Makes me shake my head - he (we) didn't know what was going on and it was a bit hard there for a while.

Love you, doggie, I'll come and throw the ball to you in a while, hey?

Have a great day everyone!

19 September 2011

A little story

Andrew and I did a divide and conquer at the supermarket recently and when we got back home I pulled out a tin of dog food.

We don't buy tinned dog food and then I saw what was on the tin.

"Did you buy this because the dog on there looks like Cody?"

"Yep"


:o)

15 September 2011

Make and Take

Hi there, 

I mentioned the other day that I was going over to the make and take at PC yesterday and I did. And I likeeed it.  


Here's Teena with her completed project.

That's a box cut out on the Big Shot Pro. Did you know that if you buy your paper at PC you can get things cut out for you on the Pro for I think it's 50c a cut? Good if you've got a wedding in the family, or a party, or a baby shower. Cute.

For our projects we all coloured a La La Land stamp - she was called Fancy Marci - so cute. I also like Sugar n' Spice Marci. So gorgeous.


There they all are. La La Land - such a cute name.

Cute - it's one of my favourite words today.


And all the Copic markers. They're amazing. Architects have been using them for years, as well as book illustrators - hello, they're good pens.

So I got to use them for the first time with Trevor showing me the ropes. He ran the make and take and showed us all how to colour in evenly and nicely. I had a light touch apparently.


Here's my Marci.

The hardest thing with colouring (and it's always been the way with me) is settling on the colour scheme beforehand.

With punch art I can punch the shape out until I find the right colour. I can literally stick that flower in her hair in 17 different colours until I find the right one (not that I know anything about that or anything. A punch art girlie was recently giving me curry with the colour of the flower in her hair...needed to be orange in the end).

I'm not overly fussed with the blue and yellow of Marci's dress, but hey, I had to make a decision. Trevor steered me away from pink because he'd seen too much that day - ha ha. I didn't like the green one and I'm not a purple girl, so blue and yellow it was.

I went with red accents and wait for it...


...pink foiled lipstick!

Trevor did the colouring bit with us and the PC girls took over with the extra bits.

To get the lipstick look we used a Quickie Glue Pen (glue with a biro sized tip) to colour in the lips. Then we  heat set the glue (it's the type that goes on blue and dries to clear...and repositional) to make it tacky. And then we put the foil over it and rubbed it on.

So cute and fun - don't you love it?


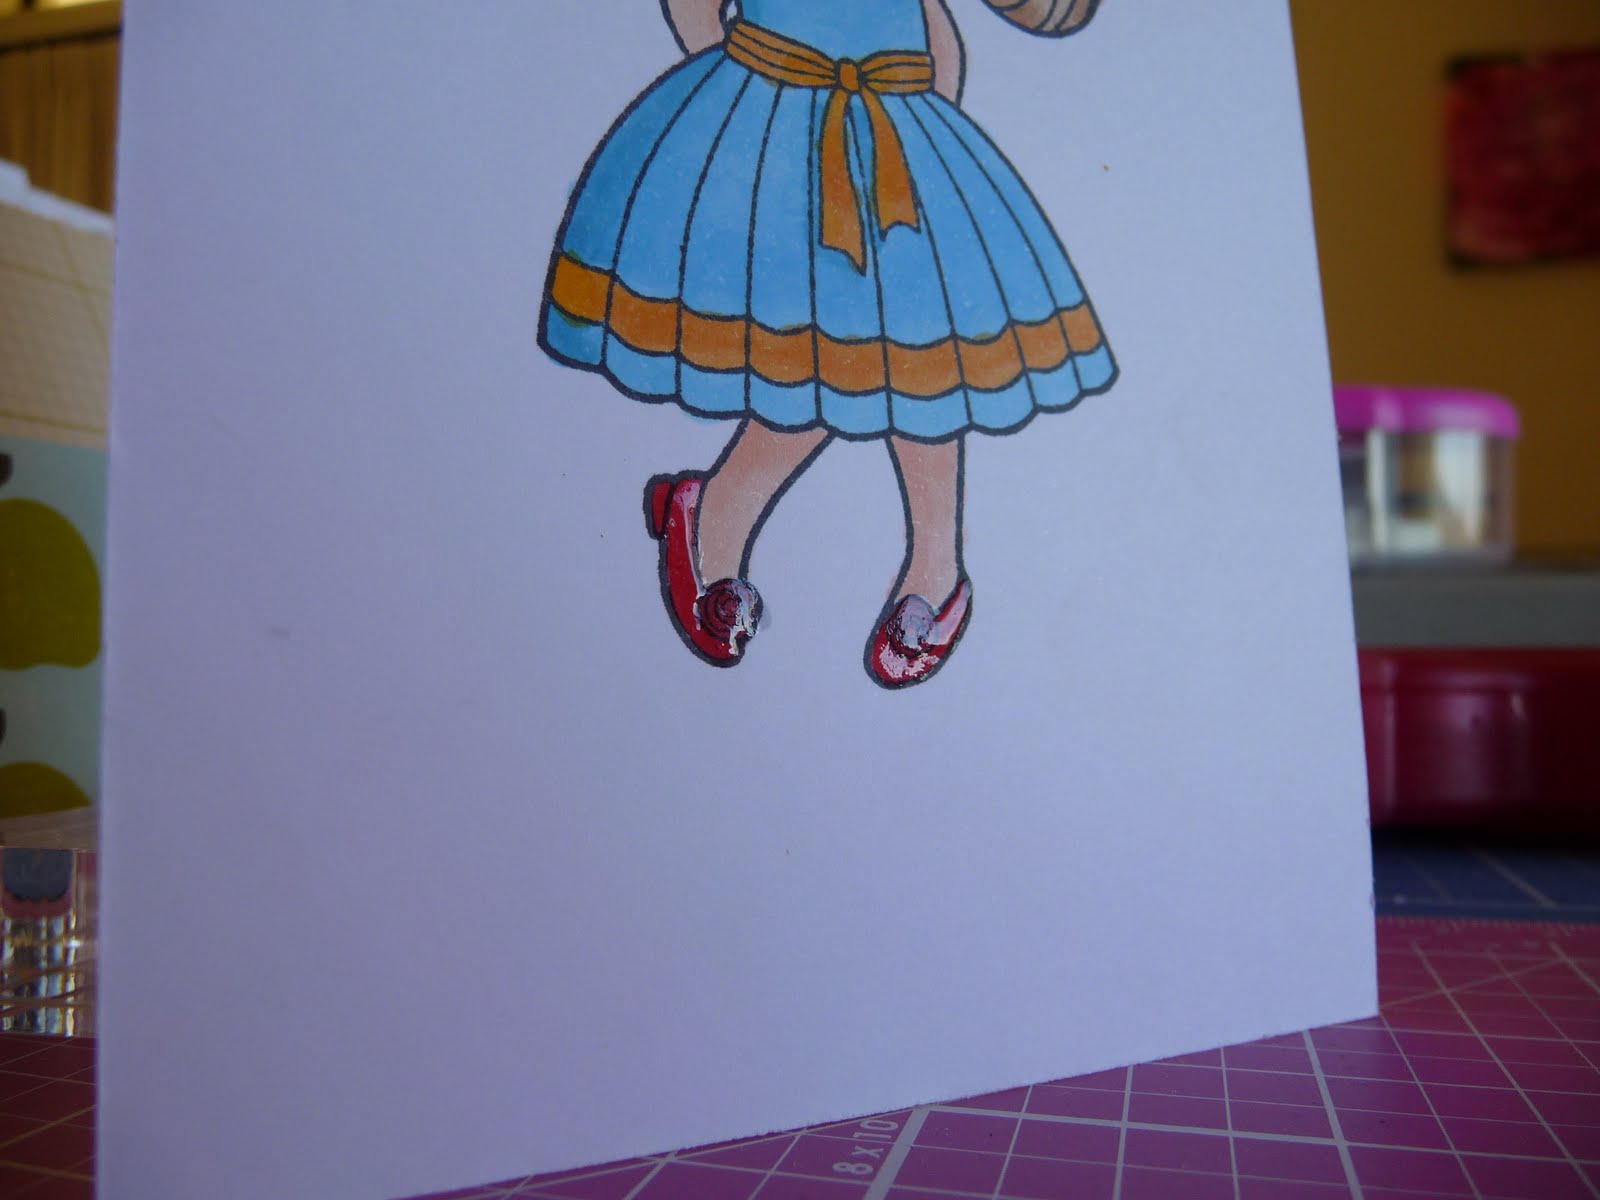
She needed a bit of something to accent the red bits, but they didn't have any red foil, so I added some Dimensional Magic here at home.

Pretty happy with my first attempt with the colouring and I think she's pretty sweet.

I've yet to cut her out. The top of the white is chopped behind her head because that's where we were testing colours and it was putting me off...choppo.

The whole thing was fun, I learnt something new (a few things), got to spend a bit of time with the girls and gave to a good cause at the same time.

Win, win if you ask me except that Mum wasn't able to come. Poo.

Now, Marci, what am I gonna do with ya?

I'll probably cut you out and put you in my photo album at some point. It's all part of the story. That's another benefit of putting photos in albums - you can put other stuff in there too that tells your story. Oh, love it.

14 September 2011

Craft show update September 2011

Thoughts on the craft show:

1. As far as Defcon ratings go, this one was a 2/3. It was constantly busy on Friday, but totally doable and fun. Saturday had some busy spots. I thought Friday was busier actually. Unusual. Sunday was a Sunday - lots of milling and chatting and helping out. Definitely a Defcon 3/4. 

2. Sunday held a little drama. One pregnant customer was looking flushed and I was a bit concerned. I asked if she was okay and she said she was fine. 

Ten minutes later she was holding onto the cabinet with one hand, holding her belly with the other and exhaling deeply. She was complaining of being hot and thirsty. I got a chair for her and Julie and I fanned her while I also got her hair off her neck. 

Peter (the guy who puts the show on) came over and asked her all the right questions and made sure she was okay. Turned out he's a superintendent in St John's ambulance. He was fab - so calm and he knew what he was doing. 

I was having flashes of seeing the girl (she was 21) going off in the ambulance, but she didn't need to, she was fine. She was watching Julie do her stencil demo after about 10 mins! 

Turns out she hadn't eaten much all day...both Julie and I told her a couple of times to look after herself and to eat. She was too busy shopping...funny. Wasn't at the time... 

3. Maybe she should've had a double breakfast like me. It really is the best way to go. Proved it again this time. Concerns boss lady though because I don't take a lunch break. She gave me a tomato to eat (which I did) because I don't get fed she said. 

4. If I really needed to go take a break, I would. 

5. If I need to use the bathroom I go. 

6. I drink water. 

7. I drank enough water to make myself go to the bathroom, so I could see myself in my hat. 

8. See Teena (at register), Julie (with apron on) and Steve (out front of stand) with their crowns on? The whole thing was accidental...

9. On Friday afternoon, at the end of the first day of the show, I was thinking about how I was going to make a paper chandelier. I'd punched a row of the Daisy Fan deep edger and joined the two ends together to make a circle. Teena saw it and her eyes lit up. "I'd so wear that," she said, "I'm serious. Let's all wear crowns tomorrow with a different deep edger!" And then she went off to the bathroom. Steve and I looked at each other and I decided I'd punch them out that night. Bitta fun, right?

10. I arrived on Sat morning and handed out a crown to everyone. Julie didn't have a choice, I just put it on her head. She's the stencil lady. They really float her boat. I know this because I asked her. She's really good at them too. Her edger was Doily Lace (a paper ribbon one). 

11. Stephen wasn't Stephen all day. He was Sir Infinite Loops. He wouldn't do anything for Teena unless she called him Sir Infinite Loops. 

12. I was Debra as usual. I should've called myself by my proper name - Princess Vintage Doily. 

13. Teena was Princess Daisy Fan. Hers was the biggest crown, but I decided to go bigger on Sunday and upped the ante with a few extra layers.  

14. She then asked me to build an extra layer for her with a dangly bit in the middle. I did, but it failed. 

15. I made a glittery ball that was just too heavy and her hat ended up looking like a Santa hat with the ball hanging at the side. She hung it from the middle - was funny. Here she is working below...


See the glittery ball at the front? Pretty hard to see, but it's there.


And here she is with her eye lashes on. At least they look like eyelashes. So funny. All this had us cracking up over the few days. That's what craft shows are for - for cracking up at - otherwise they're not fun. And they've gotta be fun, hey, Teena?

Yep, for sure. She said she's not going if they're not fun.

Hey, she's a beader, not a papercrafter, so she's gotta get her kicks somewhere.

She does kicks too. Like dancing type ones at the front of the stand when she's had a good fun day razzing people, wearing her Daisy Fan hat and selling stuff, of course.


Here I am behind my Christmas circles. You can't really see my hat...should take a photo of it for you so you can see it.

It was normal at this point with just phase two attached. Phase one was the crown (one strip around my head). Phase two was two cross-sections and a ring on the top.

Phase three...wait for it...was four more rings on the top. I was asked if I had an antenna coming out of my head.

Yes, Heidi, I did.

PS. Made those circles with the new Sizzix Circle Framelits. Love those suckers. Used a die from Cottage Cutz (I think it's called Scalloped Doily) to make the glittered doilies inside the circles. So fun. And glittery.


Here are some other Photo Continental circles I made with the Curvy Cutter this time. Teena asked for them to decorate the stand and make it fun.

The hardest part of them was wrangling the invisible thread I used to hang them. It does it's job well. It's pretty invisible, I'll give it that.

(Cody's asleep just outside on his bed and he just howled in his sleep. So funny. Perfect pitch too. Wonder what he was dreaming about? Probably me throwing the ball to him the professional that I am at it)


Oh, Christmas circles and glittery doilies. Teena and I love stuff hanging off the stand. We'd have it full of stuff if we could.


Ooooo, glittery flowers. More on this soon.

That's Martha's Vintage Floral combo set there. Niiiice.


Christmas garland using all the deep edgers. Fun idea for Christmas. Wanted to make more loops, but didn't get a chance.

I see a Sizzlit there. We only sold Big Shots and Texture Boutiques at this show - no Cuttlebugs. I enjoyed not getting the, "What's the difference between the Big Shot and the Cuttlebug?" question.

Hey, I'm there to answer it and I'm happy to, but it's becoming harder to keep die cutting/embossing straight for the newbies, so to not have to answer it was good.


Ah, punch art, I love you.

In the midst of all the crafting craziness, I'm still drawn to your bright colours and clean lines. You will forever be in my heart....


And so will you, Santa, you rock.


Martha sampler again. It's the same as the last show, but with a couple of extra additions.

See that dark blue one at the bottom? It's called Deco something and I've dismissed it before, but how pretty is it? This is why I punch them out, they look so different. Not going to buy it, but it's nice to see it punched out.

Can't judge a punch by it's packaging, can you?

And you know what? These punches are called Punch Around the Page and I've never punched around the page. Like the whole page... never done it. You?

Decided to give it go...


This one's called Cherish.

Oh my word. Looks so lovely.

Can you see it properly? Hope you can. I love this set. It doesn't look great as just a border, but it's fab, fab, fab as an around-the-page. I've made doilies with this one too. One of my very favourites.


How about this one?

It's called Swirling Lace. Again, nice. Again, punched all around the page.

If you've not done it before, I encourage you to pull those punches out and punch all around a 12 x 12 sheet.  Corners first, edges second.

Note: How good are all those photos of the projects? I'm not tooting my own horn about my photo taking abilities, I'm tooting about the good light. Wish I had that kinda light to take photos here. I've given up until it gets warmer and the sunlight's stronger.

Don't you love it? Take a few quick snaps and they rock. Set up a photo shoot here at home and spend ages trying to get the light right and then discover all my work is in vain because the photos look horrid in the end. That's why I haven't posted close ups of the cards from the last craft show - all the photos were terrible. Want to re-do them.

Moving on to the last couple of photos of the stand...


Blue circles with Christmas punch art on them...should've been Christmas colours, but it was kinda a last minute thing.

The red circles are Christmas baubles with some stamping on them.

I'm really into stamping at the moment.

My capabilities (and like-a-bilities) extend to only stamping with ink and/or embossing over the top. Loving it for sentiments and bits and pieces in my scrapping. Oh, I did do those cards for the nephews that I showed last week too. That was stamping and then die cutting the shapes. Pretty simple, which suits me.

No distressing or alcohol inks for me. Too messy. Too unpredictable. Too abstract.

Interested in the Copics though - not to buy, just to have a go at - so I'm going to Photo Continental this Weds for the fundraiser they're doing. It's on on Weds (9:30 to 4:30) and Thurs (1 to 7 pm) for the cost of $5 per card. I think those times are right.


One last shot of the stand showing one of the best specials of the weekend - any four folders for 20 bucks. And all subsequent folders were five dollars too. I bought five - two Christmas, two man ones and another...what was it? Oh, another Christmas poinsettia one.

Big Shots were $99 again - amazing. Spellbinders were $25 and all the Marthas were $20 for the Deep Edgers, Borders and Punch All Over the Page ones (magnetic ones) and $30 for the combos.

I've gotta say thanks to you, Teena. You've bought the show special back. Years ago there were specials at the show, but then for a while everything was full price. So boring and took the fun out of going. The fun's back now though. Show specials are what it's all about and we have Teena to thank for that.

Good for you, Princess Daisy Fan.

I'll make you a better crown for the October show, ok?